Saturday, February 16, 2008

Grilled Hot Dogs - Easy and Fun - Good For New Barbecue Cooks


Hot Dogs - The Other Grilled Meat - Cheap and Easy

Don't let the high foods prices get you down or prevent you from grilling out or having a party. It's really about getting outdoors and having fun. Almost anything cooked on a grill is tasty.

If you keep an eye on the sales, you can get a pack of hot dog weiners for a buck or two. Buns run about the same.

Hot dogs are also a good starter grill item. They're basically cooked and only need to be heated (sausages may be cooked or uncooked - be sure to check). When hot dogs have grill marks and look sweaty, they're ready to eat.

Learn more about hot dogs and sausages Yes You Can Grill! and fire up the barbecue. Any day is a great day for a cook out.

Grilled Beer Burgers - Barbecue Hamburgers with Beer Sauce


Heat up some barbecue beer sauce, and give your grilled hamburgers some extra gusto. The barbecue sauce goes on after the grilling, so it is served on the side for those family members or party friends who enjoy spirits with the meat. The kids and the teetotalers can still enjoy the burgers sans the beer dip.

Beer Burgers are easy to make, and they taste fabulous. These are great for tailgate parties or just for a fun evening at home.

If you need help with making your own hand patted Burgers on the Grill, check out my Yes You Can Grill Hamburger Guide. Then just add the beer sauce.

Wednesday, February 13, 2008

Barbecue Smoker - Smoky Mountain Bullet - Weber


Barbeque Smokers
Make Your Own Mouth Watering Meats


I hesitated on buying a barbeque smoker, because I knew that the process in smoking meat meant low (temperatures) and slow (many hours). Though I love to grill, I wasn't sure about investing from 4 hours up to a full day tending the grub.
If you've ever had pit cooked barbeque or ribs, then you know that smoking means that the meat is fork tender. It just falls right off the bones. The meat picks up the flavor of the smoke and is simply impossible to beat on taste. We live in barbeque country and are huge fans, so visions of home smoking continue to dance in our heads.

We Decided to Go For It

My boys and I finally talked ourselves into getting a smoker, and we discovered that it's not nearly as difficult or labor intensive to smoke as we had thought. A good quality smoker pretty well tends itself. We'd prepare the meat, start the fire, check back now and then, and the results . . . oh man . . . we're talking some really good eating.

Before buying a smoker, I did a lot of research. Yes. I'm the nerdy type, but it really does pay off to read before buying rather than after making a bad purchase.
There are some gas and electric smokers on the market, but most of the big barbeque fans go with standard charcoal/wood models. It's a little more work (not much really) to get charcoal fired up, and it takes a little more effort to regulate temperatures, but it's hard to beat old fashioned charcoal smoking.

In looking at charcoal/wood smokers, barbeque fans really raved about the Weber Smokey Mountain Bullet. Weber is known for excellent quality products. (We've used our Weber grill for years.) Another plus is that the smoker design by Weber means low maintenance during the smoking process. I was sold on getting a smoker that would last a long time and would be easy to use, so our pick was the Smokey Mountain Bullet.

Getting Started

Before smoking, we read up a bit on the process and checked out recipes. The Bullet comes with a small recipe booklet, and there is a great site called The Virtual Bullet at www.virtualweberbullet.com with almost everything you could think about when it comes to smoking.

Before smoking, you'll need to rub down the meat. It can go on without rub, but the seasonings do make the meat much more tasty. There are loads of rubs on the market, and there are lots of recipes for homemade rubs. One really good rub that is easy to find is Emeril (yes—made by the cooking show guy). Rub the meat down a couple of hours before cooking or the night prior.

The first step in smoking is to get the fire going. A barbeque chimney which is kind of like a big can really helps in getting the coals ready. You can't use the pre-soaked charcoal (usually called Easy Light or Quick Start), because the starter fluid will give the meat an off taste. Most any plain charcoal is fine though Kingsford seems to last longer and burn more evenly.

In order to get smoke, you'll need to get some wood chunks and soak them in water. If you don't have your own wood, then wood chunks are sold in bags at the grocery store. The wet chunks are placed on top of the burning charcoal and produce the smoke. Various types of wood give different flavors. It's fun to try out different woods.

You'll also have a water pan with the smoker. That is above the coal area. Before filling the pan with water, cover it in tin foil. Juices and fat drip down in the water pan, so it gets pretty messy. Using tin foil on the pan helps a lot on clean up.

Once the fire is going and the temperature regulated, you put the meat on. Temperatures and times vary depending on the meat being cooked. Weather conditions can also impact. Recipes help in the beginning. After you smoke a few times, you'll be able to get a "feel" for the process and can wing it.

We typically check the meat every couple of hours but have left the smoker going as long as six hours on its own during the night hours. It's hard to get used to leaving well enough alone when smoking. Taking the lid off to check drops the temperature and adds to the overall cooking temperature.

Generally, you need to add extra charcoal and water to the pan a couple of times during a smoking session. Extra wood chunks may also be needed if the smoke is not cranking out.

If you want barbeque sauce on the meat (yum), that is swiped on about a half hour before the meat is done. If you put the sauce on at the beginning or too early, then the sauce burns and the meat looks black (though is fine under the dark layer).
Yes. You Can Do This!

Smoking meat is much easier than I expected. Though it does take a long time to cook low and slow, it's just a matter of getting the smoker going and then checking now and then to make sure the fire is going and that the water has not cooked out.
Meat from a home smoker is absolutely fabulous. I love the local barbeque, but the home smoked is even better.

Another plus with home barbeque smoking is that the meat is just as tasty frozen and then reheated in the oven. The flavors really sink in over time. That means that we can smoke up some meat and then enjoy the results over several meals.

Tuesday, February 12, 2008

Easy Grilled Pineapple - Barbecue Fun


On of our favorites on the grill is pineapple. It's really easy to grill pineapple. And, it can be served as a side or as a dessert.

You can used canned pineapple on the grill, but we especially like fresh pineapple.

If you are thinking about grilling pineapple, check out my Grilled Pineapple recipe at Yes You Can Grill.

Perfect Hamburgers on the Barbecue Grill


Yum! Burgers are Delicious Cooked Out on the Barbecue Grill.

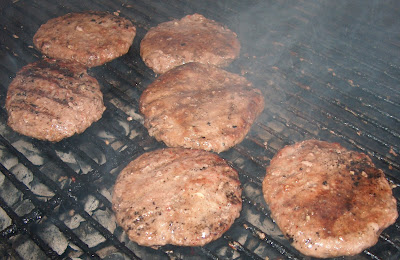
Burgers are the top pick for outdoor cooks according to a survey by Weber. And, they sure are yummy. Of course, some burgers are lots better than others. If you have problems getting your hamburgers perfect, try out my Hamburger Grill Guide. That should cover any question you have about making burgers on the grill, and if you follow the steps, you'll have the best grilled burgers you've ever tasted.

If you have specific questions or have had problems with your grilled burgers like the burgers falling apart or sticking to the grill, check out my Hamburger Troubleshooting Guide at Yes You Can Grill. That should cover all your grilled burger problems, but if you come up with anything else, let me know.

Monday, February 11, 2008

Southern Pecan Pie Recipe


Here is the Yummy Pecan Pie I Made to Go with Smoked Barbecue Shoulder


We grew up with pecan trees in the yard, so we had pecan pies often. If mom was willing to make pies, all “the kids” were certainly willing to pick up and crack out the nuts. We went through a lot of nut crackers, and my dad kept buying new and improved crackers. As we grew up and moved out, he continued to crack out nuts with his various crackers. And, mom kept making pecan pies but mostly at holidays when the family headed back to visit.

There are loads of variations on the basic pecan recipe, but I’d say that I like the traditional southern recipe the best. It’s simply hard to improve on something so delicious.

Check out my Southern Pecan Pie at Yes You Can Cook. It's an easy pie recipe, and I include some tips in case you run into questions and/or problems.

Pecan pie is probably not the first dessert that comes to mind when you're grilling, but no one is going to complain. It's very tasty. Pecan pie is more traditional if you're smoking during the colder months or if you enjoy deep frying turkey outside.

Sunday, February 10, 2008

How To Tips - Grill Corn on the Cob - Two Ways - Both Easy


Most folks love fresh corn on the cob and especially grilled. I know it's one of my boys' top picks for barbecue side dishes.


There are two ways to do corn on the grill. One way is in tin foil and the other in the husks. Both are delicious - just different.

Corn on the Cob in Aluminum Foil

First shuck the corn. Lay it on a piece of tin foil. It's really good if you add butter. Sprinkle cheese in the shake can and seasonings can also be added. Then wrap the corn up in the foil.

It depends on how hot your grill is, but I usually run about 20 minutes on aluminum foil corn. I roll it every 5 minutes or so. To double check, just use a fork and stick it in through the aluminum foil. The fork slides in easily when the corn is ready.

Grilled Corn on the Cob in the Husks


This is my favorite way to grill corn on the cob. It's so easy.

Put the corn with the husks on in water. This can be in the sink or a cooler. Let the corn with husks soak submerged in water for 20 minutes or more.

Put the corn on the grill with the husks on. Turn them every little bit. With the heat level I use, the corn runs close 30 minutes to be done, since the water keeps it cooler starting out.

The great thing here is that when you pull off the husks, the corn strings or tassels just fall right off. That means no work other than soaking and tossing on the grill.


Beer Butt Chicken Recipes and Tips


How to Make Beer Butt Chicken on the Barbeque Grill

It's hard to say when or where Beer Butt Chicken originated. A safe guess would be that a group of guys came up with this gem of a technique for barbeque grilling a whole chicken. Picture some good old boys sitting around guzzling cheap beer and not being too keen on keeping watch over chicken pieces roasting on the grill. One of the fellows probably pondered on the situation. Since the cavity portion of a hole chicken is roughly the size and shape of a beer can . . .the rest is history.

If you'd like to make Beer Butt Chicken, see my Beer Butt Chicken Guide at Yes! You Can Grill. I have Beer Butt Chicken photos up as well, so this recipe is really easy to understand and follow.

You may also want to check out Beer Club of the Month where you can have new beers delivered every month and have a different flavor every time you make Beer Butt Chicken. My son lives in a micro brew area, and he turned me on to the fact that you can find a way lots more variety than at the grocery store on beer. Unfortunately, I don't live in a micro brew area as I'm sure many other don't, so it's really neat to just set up a subscription and have something new and cool every month.